Create Key Changed Karaoke CD+G Discs
Do you take your karaoke CD+G discs with you to karaoke shows or use them at home? Do you often make use of the key change feature when you perform karaoke? If you answered yes to these then you should find this tutorial interesting. I'm going to show you how to create custom compilation CD+G discs, from your CD+G discs, while permanently assigning the desired key change setting for each song. No loner will you need to ask the karaoke host to change the key hoping he/she doesn't forget.
Power CD+G Burner 2 is the only karaoke disc burning program that has the key change setting feature. It is also very user friendly and even a computer novice can learn to use it in just a few minutes. Other things this program can do include making precise duplicates of CD+G discs... rip songs from CD+G discs to popular formats like BIN, MP3+G, and KMA... create CD+G discs from downloaded MP3+G files... convert between several karaoke file types. There are limitations with the demo version of this program, but if you plan on working with CD+G discs and/or MP3+G files it is more than worth the $39.
The
demo version has the limitations of allowing only five songs to be added to the burn list and only the first minute of the songs will be processed. Beyond that it is fully functional. Regardless of rather you are using the demo version or the full version the procedure is the same.
Step One
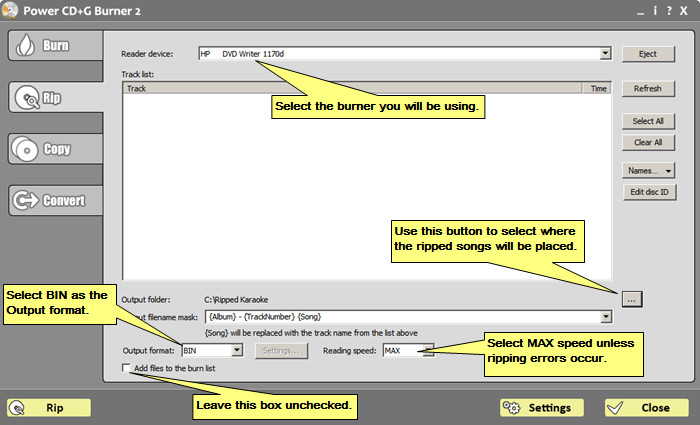
Open Power CD+G Burner 2 and select the
Rip tab. Make the settings as indicated in the image below. When you go to select a folder where the ripped songs will be placed you might consider creating a folder and naming it
Ripped Karaoke. You can make the folder in your documents folder, on the Desktop, or directly on the C: drive. The important thing is to remember where it is so you can easily find it later.
Step Two
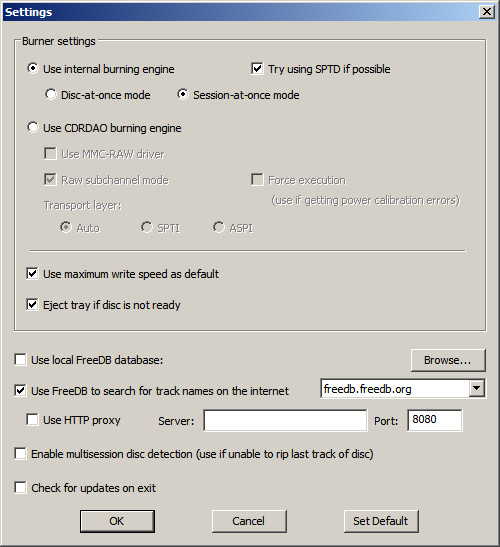
Click on the
Settings button at the bottom of the program and you will be presented with this panel. All the settings should be just like you see below. You will only change these if you are unable to successfully burn a disc.
Step Three
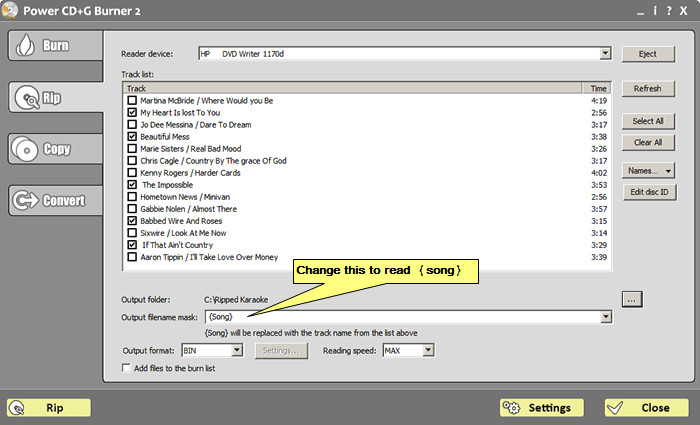
Load a CD+G disc, that contains songs that you wish to add to your custom disc, into the CD/DVD burner. Within a few seconds the song tracks should appear. If they do not, click on the
Refresh button. If you have an internet connection the program will automatically fill in the names of the song tracks. Otherwise it will simply name them Track 01, Track 02 etc..
Check the box beside each song you want to rip from the disc. To make things simple I recommend that you name the songs by their song title only. You can easily rename them by double clicking on them and typing in the name. Of course you only need do this on the songs you are selecting. As you can see below I selected five songs and renamed them to only their title. Change the
Output filename mask to
{song} only.
Now click on the Rip button and the process will begin. This will take only a few minutes to complete depending on the number of songs selected.
Step Four
For this tutorial I'm going to only rip songs from the one disc. If you have additional discs that you wish to rip songs from then simply follow the above steps again for each disc. Keep in mind that you can typically fit about 18 songs on an 80 minute (700 MB) CD-R.
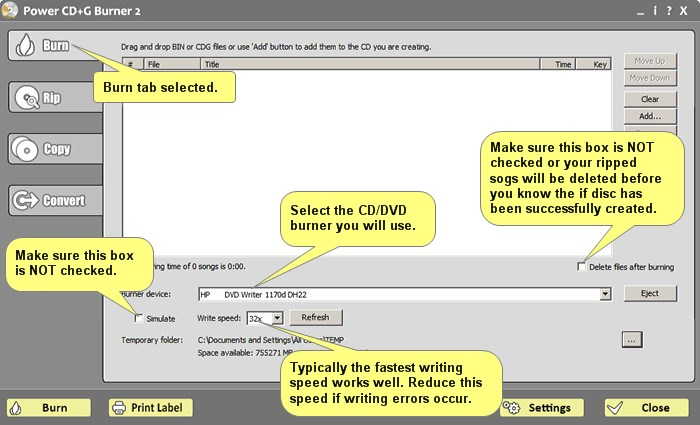
At this point you will switch to the
Burn tab. Make the setting as shown below.
Step Five
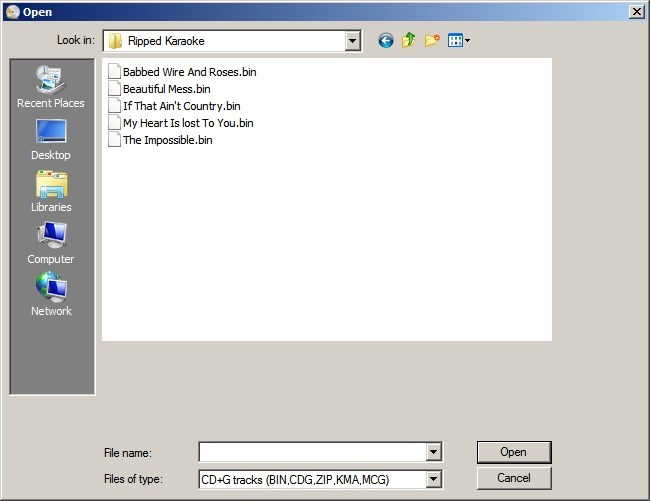
It's time to add the ripped songs to the burn list. Click on the
Add... button (right side of program) and then browse to the folder where you had the program save the ripped songs. Hold down the
Ctrl key and select the songs you will add to the disc. Once selected click the Open button and they will appear in the burn list.
Step Six
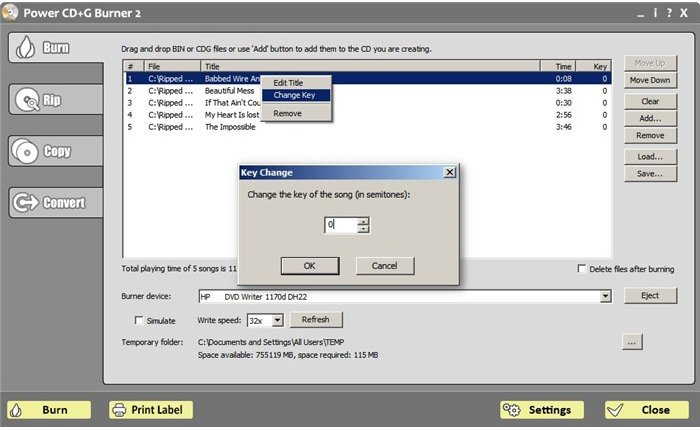
Now you will set the key change setting for each song. To do this you will
Right Click on the song and then select
Change Key. In the popup you will set the key change up or down to where you would set it with a karaoke machine. The steps are in semitones just like virtually every karaoke machine and hosting software. Do this for each song that needs the key changed.
Step Seven
Finally, it's time to burn the disc. Load a blank CD-R into the CD/DVD burner. Any brand will work but the better quality brands will produce more consistently successful burns. Now click the
Burn button and wait for the program to finish. If all goes well you will end up with a custom CD+G disc with all the songs in your preferred key. This disc will play in any CD+G disc player.
Article by Richard Wise.